This blog explains many aspects of Kubernetes production in traffic management and security. It is common to implement an ‘ingress controller’ on the Kubernetes for traffic management.
The ingress controller is a resource that can accept traffic into Kubernetes cluster along with load balancer and then manage them based on rules. In this manner you can use a single load balancer to handle multiple applications.
Another requirement is to secure the application with SSL/TLS which requires some certificate and authority to certify the security.
This document will explain how to implement nginx ingress controller on Oracle cloud’s Kubernetes (Container Engine for Kubernetes) and secure it with Let’s encrypt.
1. Pre-requisites
This blog expects you already have the following prior start with the detailed implementation.
- Container Engine for Kubernetes cluster (OKE) on Oracle Cloud Infrastructure
- Required Dynamic Groups, Policies granted to work for OKE and other resources
- Domain you own
- Remote working environment with following commands installed. If you are using Oracle Cloud shell, can ignore this requirement
- Helm
- Kubectl
- cURL
2. Architecture
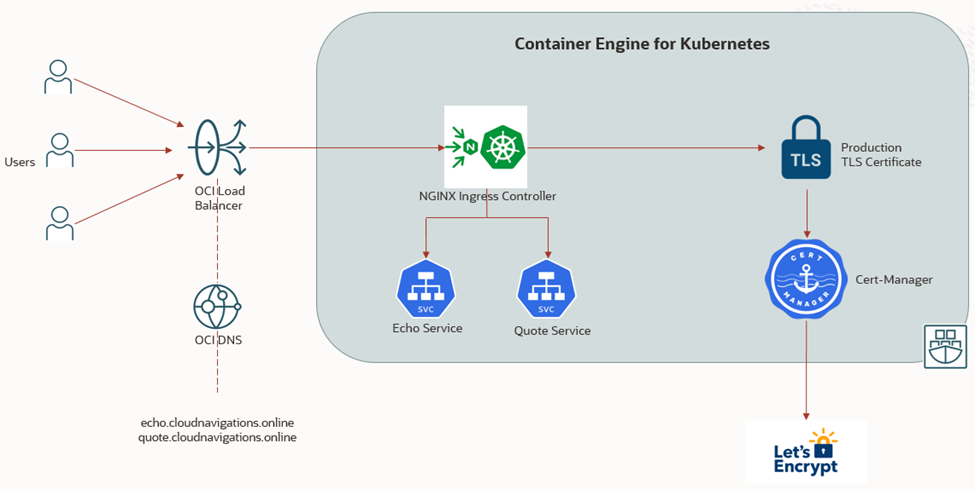
We will be building the architecture shown in figure 2.1 during this document. This will manage services ‘echo’ and ‘quote’ by the Nginx ingress controller and secured by Let’s encrypt TLS certificate. Oracle cloud will provision a load balancer as part of the implementation. We’ll integrate applications with a public domain as well.
3. Task List
The following are the high-level task list we are going to achieve during this exercise. This will be explained in detail in the next section.
- Install Nginx Ingress Controller
- Configure DNS
- Create First Backend Service
- Configure Nginx Ingress Rules
- Configure TLS Certificate
- Create Second Backend Service
4. Step-by-Step Implementation
This section will explain the process with screenshots and all required configuration and deployment files.
4.1 Install Nginx Ingress Controller
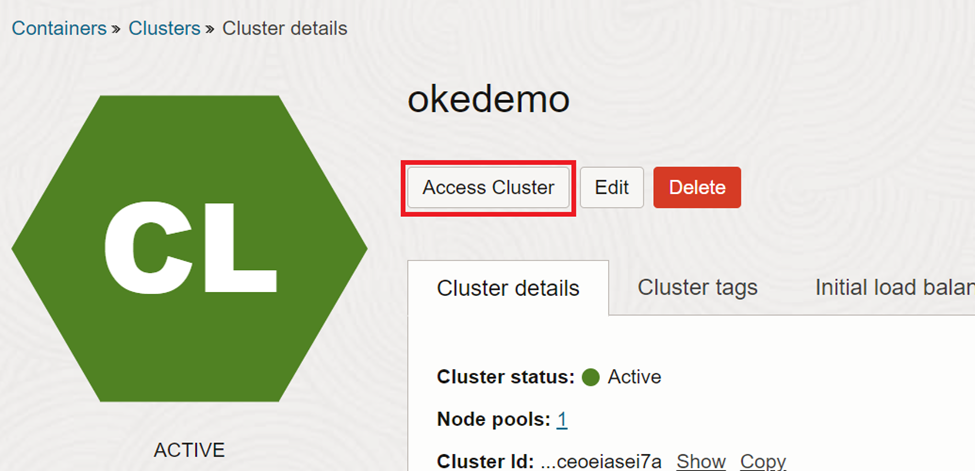
As explained this document does not cover creating of OKE and granting required policies to access the same. Once you create a cluster we’ll need access to create resources on it. Click on ‘Access Cluster’ to see the access options.
In this document we’ll be using ‘Cloud Shell’, which is an inbuilt cluster management environment on Oracle cloud. This requires launching the cloud shell (step 1) and then copy and paste the access command on the cloud shell (step 2).
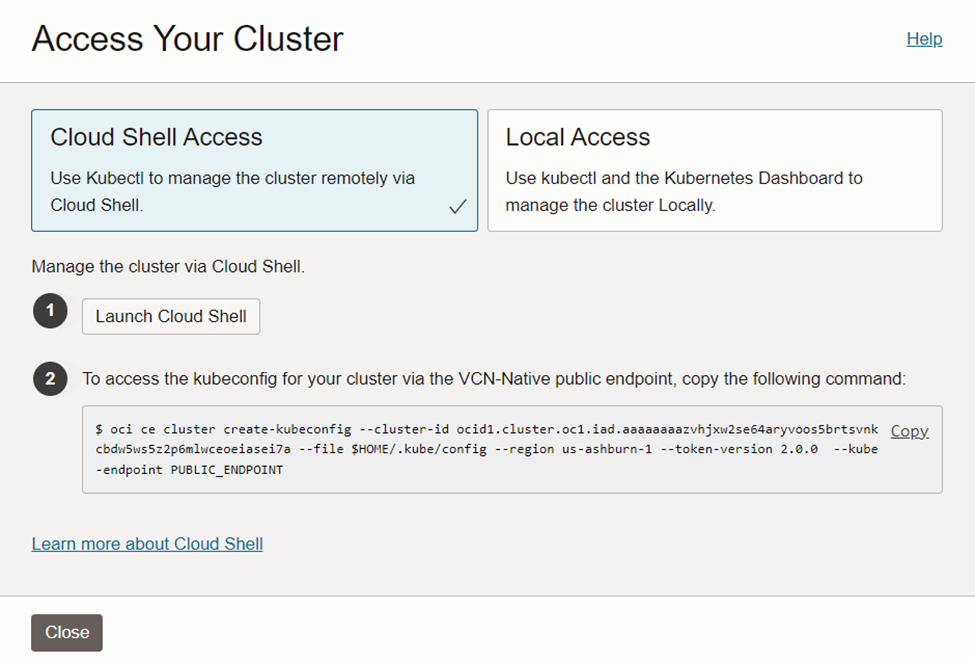
As in figure 4.1.3, access is now granted for the user.

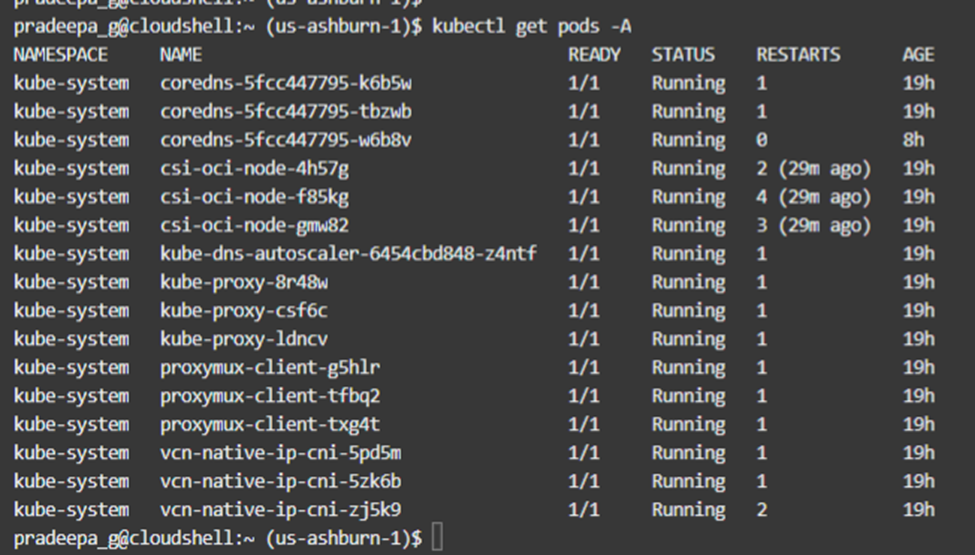
We can test whether we are connected to the correct cluster by issuing kubectl command. As we can see, there are three nodes in the cluster.

We can also check the deployment of pods on all namespaces. As we can see, no resources are deployed so far except the system pods.
We will be using ‘Helm Chart’ to deploy the ingress controller. Firstly we need to see whether we already have a repository from helm.

In this case there’s no helm chart repository in the environment. Therefore, we need to add and then update the repository.
helm repo add ingress-nginx https://kubernetes.github.io/ingress-nginx
helm repo update

Prior to installing the ingress controller, we need to prepare ‘nginx values’ and separate namespace for it. The nginx-values will mainly dictate the number of replicas, in our case 2 and other relevant parameters that need to govern nginx.

The following link has all the values supported by nginx ingress controller, so that you can choose options as required.
https://github.com/kubernetes/ingress-nginx/blob/main/charts/ingress-nginx/values.yaml
The namespace for the ingress can be created as follows.
kubectl create ns ingress-nginx

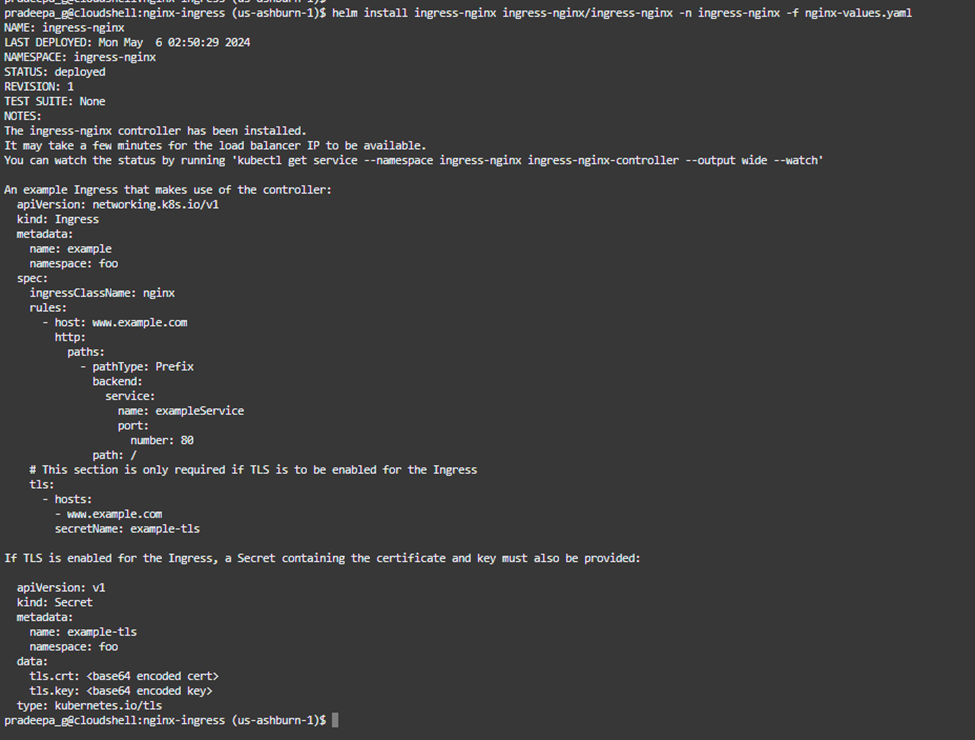
Now, it is time to install the nginx ingress controller using helm and providing namespace and values prepared earlier.
helm install ingress-nginx ingress-nginx/ingress-nginx -n ingress-nginx -f nginx-values.yaml
This task may take a few minutes and output will appear as in figure 4.1.10 below. It gives information about the next steps that need to be carried out as well.
As part of ingress controller implementation, a load balancer will be provisioned automatically. You may visit the network load balancer section of OCI console and note the public IP of it.

The ingress controller implementation can be verified by kubectl command. It will show the pods, new service with load balancer, deployment and replica set of the ingress controller.

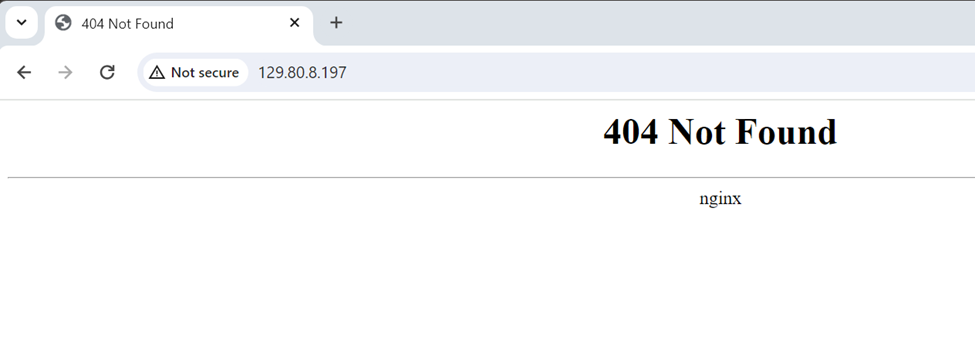
We can check the provisioning by accessing the public IP of load balancer from a web browser. As you can see in figure 4.1.13, it gives nginx output. Since we do not have any deployment ‘404’ error can be ignored.
As the next step, we need to configure the DNS of the public domain we own.
4.2 Configure DNS
This section explains configuring public domain to use for the applications we are deploying on the Kubernetes cluster. The domain should be owned by you to control the same. In this case, I use a domain from Godaddy.com. Kindly note that different domain registrars may have different methods, so if your domain is in another registrar please refer to the documentation.
As the first step, we need to export the zone file as in figure 4.2.1. This section can be found under ‘DNS’ in your domain.
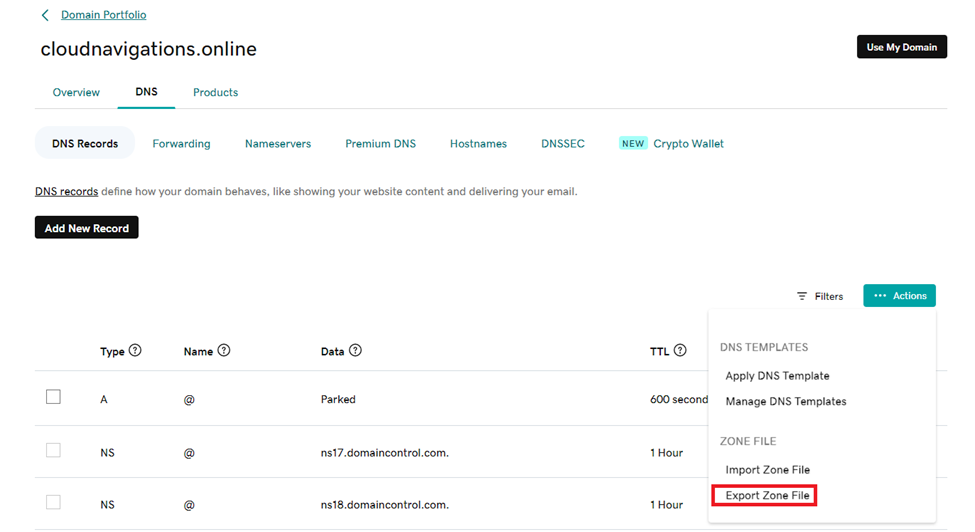
A text file will be downloaded with domain details. From there you’ll need to delete the record for ‘parked’ IP. This is to avoid an error in uploading the file.
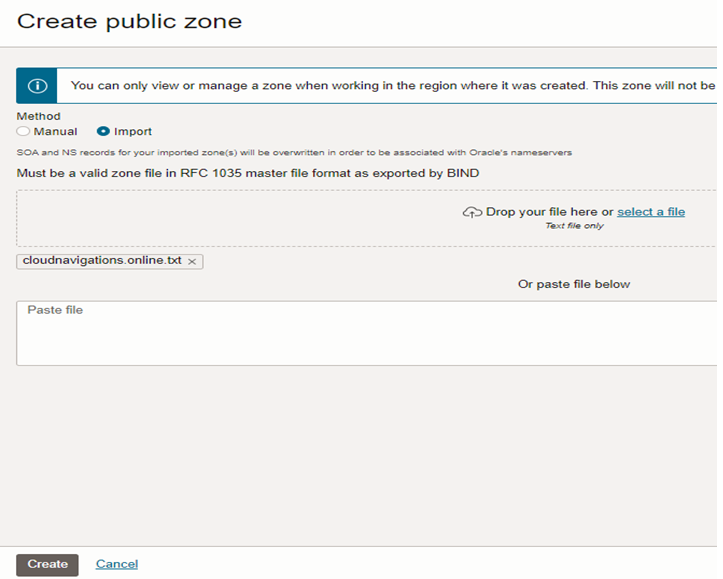
Then we need to login to the Oracle Cloud Infrastructure console to create a DNS Zone. The Zones can be found at Networking -> DNS management -> Zones. Click on ‘Create zone’ button on public zones section.
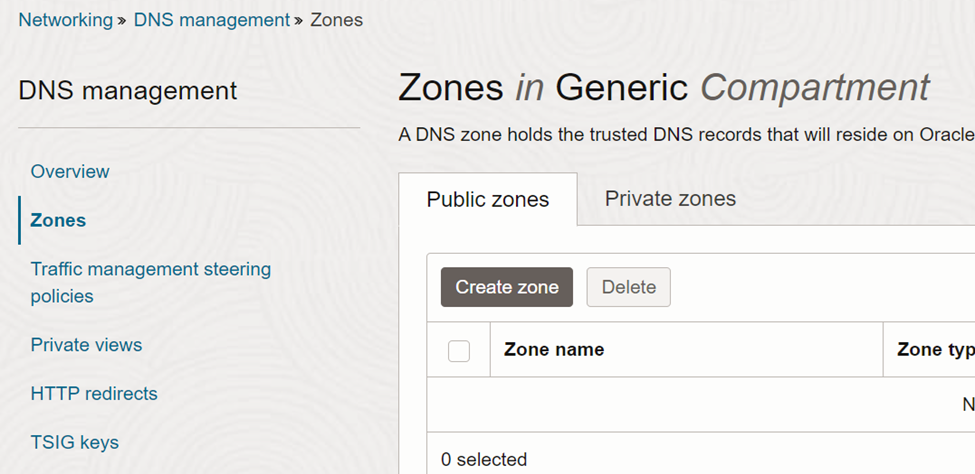
As shown in figure 4.2.3, we need to import the zone file that we get from the domain registrar (Godaddy).
Once the zone is created, go to ‘records’ under the resources section. There you can find NS records related to the public zone created.

Copy this NS records as we need to update the same domain in Godaddy. Next go back to Godaddy and edit nameservers as shown in figure 4.2.5.
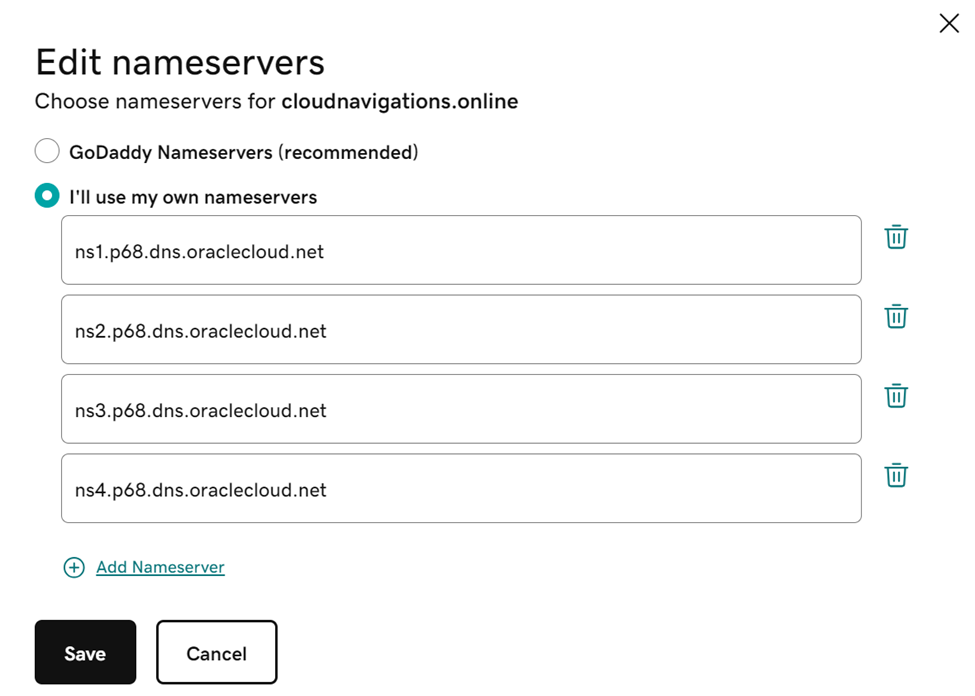
The nameserver configuration completed with this. Now we need to add an address record (A record) to link with load balancer provisioned with ingress controller.
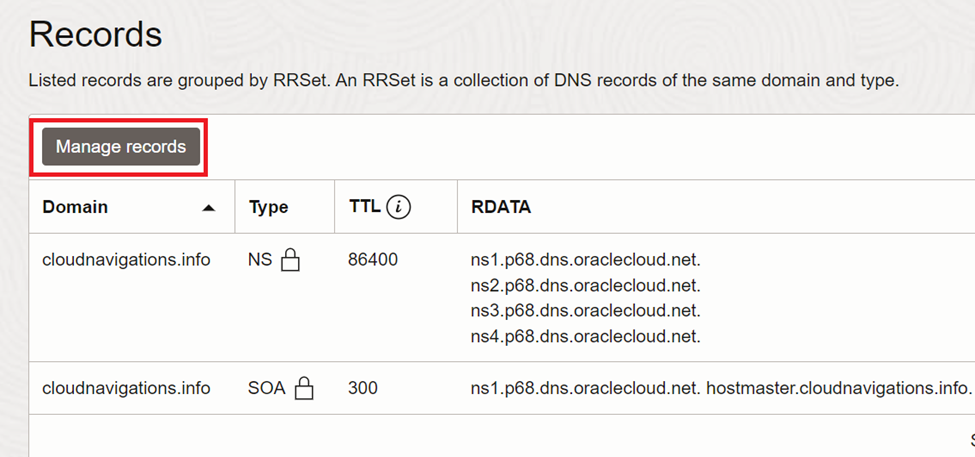
Click on ‘Manage records’ under the public zone in Oracle cloud console.
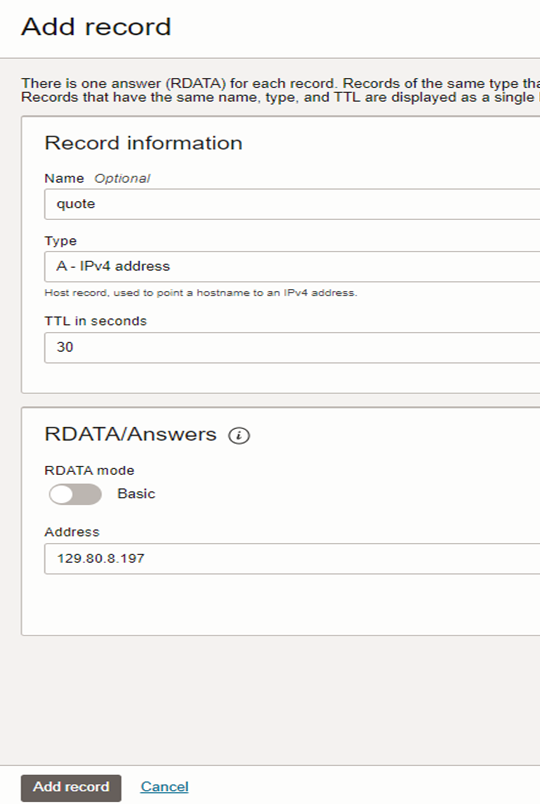
Then we need to click on ‘Add record’ to proceed.
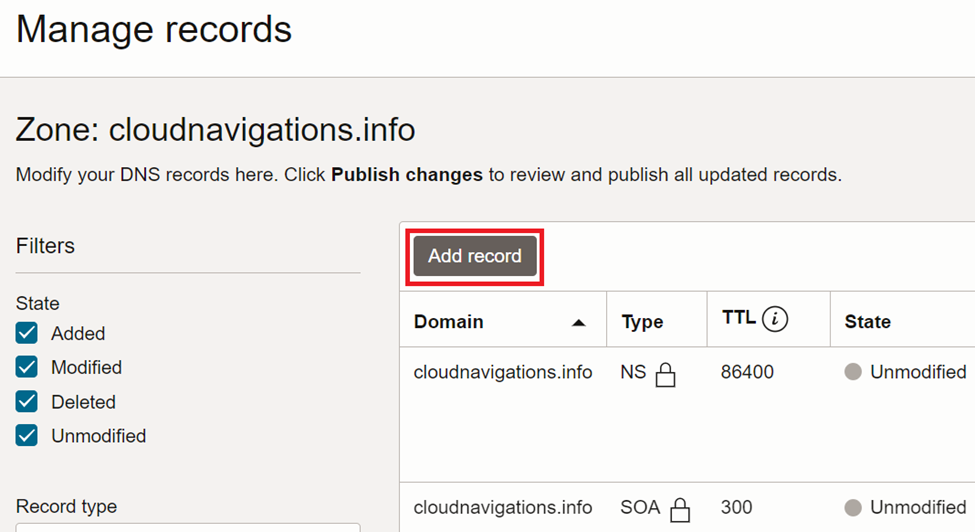
As in figure 4.2.8, provide a name for the address (this will be a part of domain record), select type as ‘A’ and paste public load balancer IP in the address field. The name ‘quote’ is the first application we are deploying on the cluster.
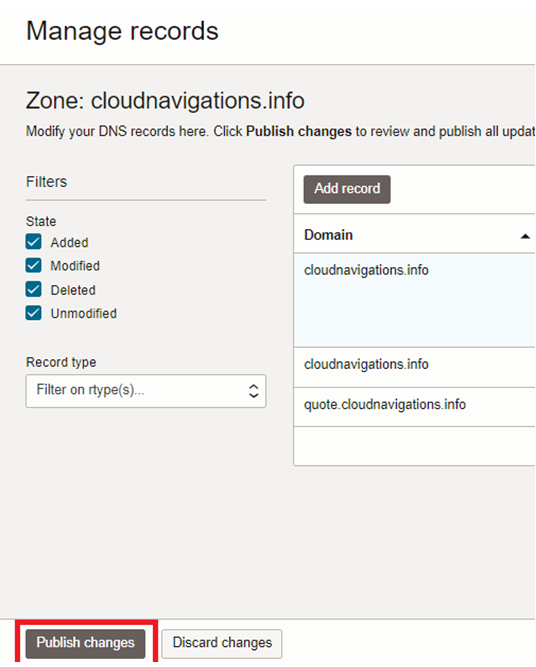
Now we need to publish the new changes to take effect.
We also need to confirm the changes by clicking ‘Confirm publish changes’.
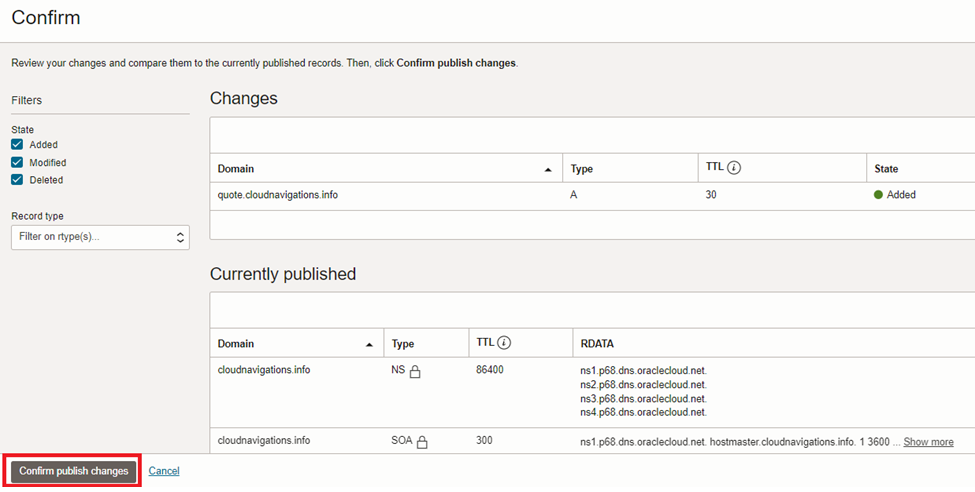
This might take up to a few hours to propagate and appear from the public. The testing can be done after we complete the rest of the configurations.
4.3 Create First Backend Service
In this section we are going to deploy our first application on the Kubernetes cluster. We’ll create the second application once everything is configured including the TLS.
This application (quote) is obtained from a public repository and produces random ‘quotes’ when run. The deployment YAML file is as follows.

This application is supposed to create a service and its YAML file shown in figure 4.3.2.

We are going to create our application in a separate namespace on the Kubernetes cluster. The commands to create namespace and deploy application along with service are;
kubectl create ns backend
kubectl apply -f quote_deployment.yaml
kubectl apply -f quote_service.yaml
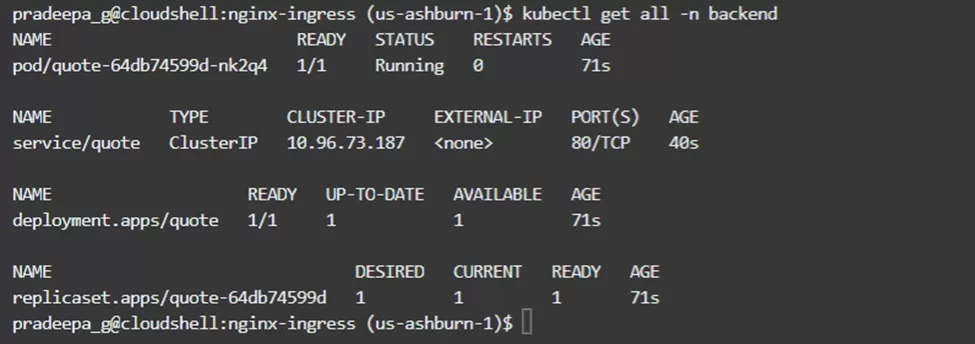
The application deployment is as follows;

The deployment should create a single pod, service named ‘quote’ and a replica set.
4.4 Configure Nginx Ingress Rules
Even Though we deployed the ingress controller, it requires some rules to navigate. The rules are called ‘Ingress’ and can be applied as a YAML file as in figure 4.4.1.
As you can see cert-manager and secret details are commented in this file. Those will be required to secure the application but at this point we’ll deploy without them to show the difference. The security details will be added and deployed later.
Let’s explore some details;
- host: this should be the domain name along with A record added
- Name: preferred name for the ingress

The ingress rule can be deployed using the kubectl command as below.
kubectl apply -f quote_ingress.yaml
After the deployment we can verify that ingress is now active with the desired route. As you can see in figure 4.4.2, load balancer public IP appears under address and domain name appears under the hosts.

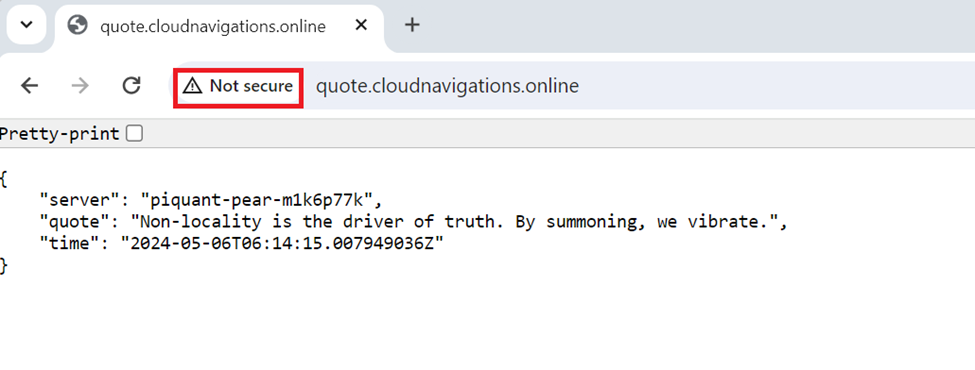
Now we can try accessing our domain name on a web browser. The application works as expected and shows a quote. However, there’s an underline security issue as shown in figure 4.4.3.
The browser hints it is not secured as we didn’t use a proper certificate.
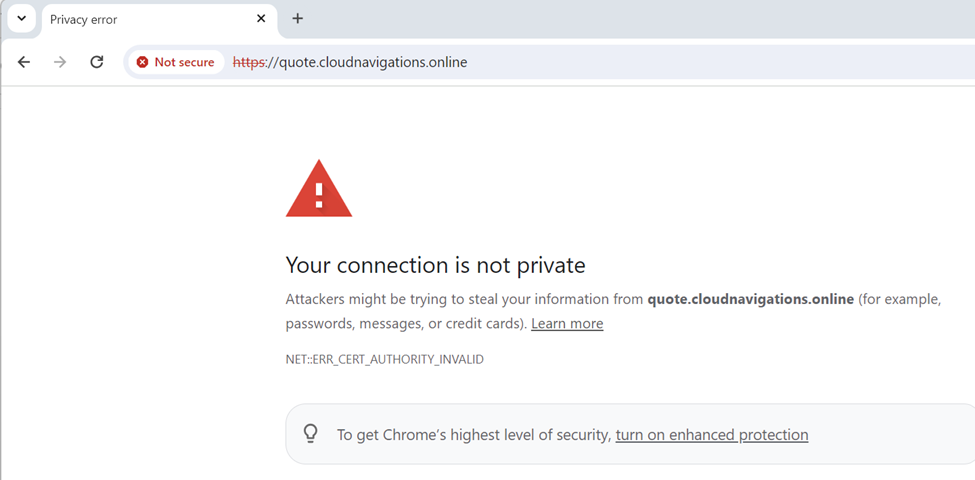
We can see the details of the certificate if the type the URL with ‘https’.
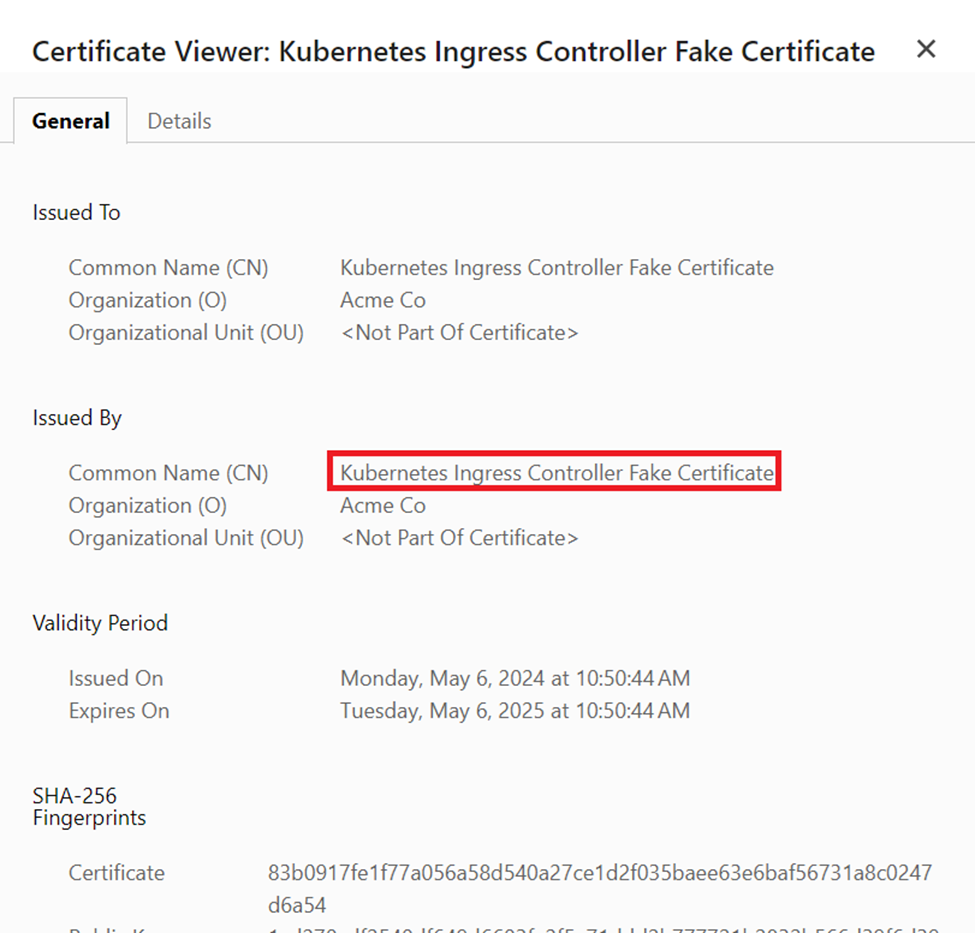
When you click on the ‘Not secure’ section, the existing certificate will show as below. As you can see, it identified as a ‘fake certificate’.
The next section will explain how to overcome this problem by installing a proper security certificate.
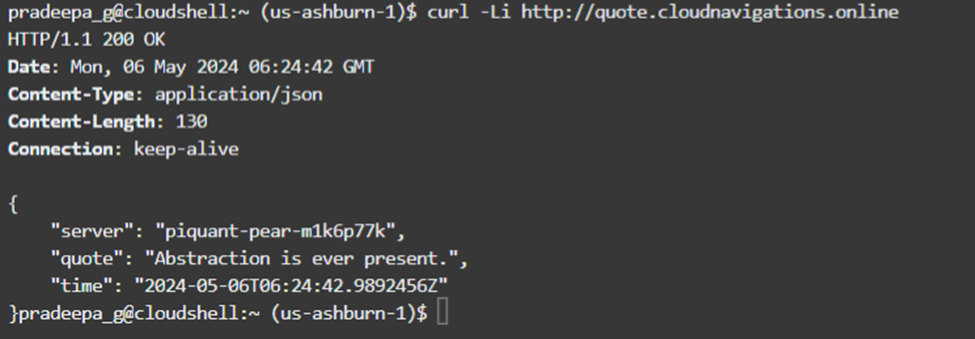
Apart from the web browser, we can use the ‘curl’ command also to verify the deployment.
4.5 Configure TLS Certificate
In order to manage TLS certificates we need to install a Kubernetes add-on called ‘cert-manager’. This add-on will ensure the validity of the certificates by renewing them prior to expiry.
As we can see in figure 4.5.1, Cert Manager can handle many certificate ‘issuers’. In our case we are going to use ‘Let’s encrypt’ which we will discuss in the coming sections.
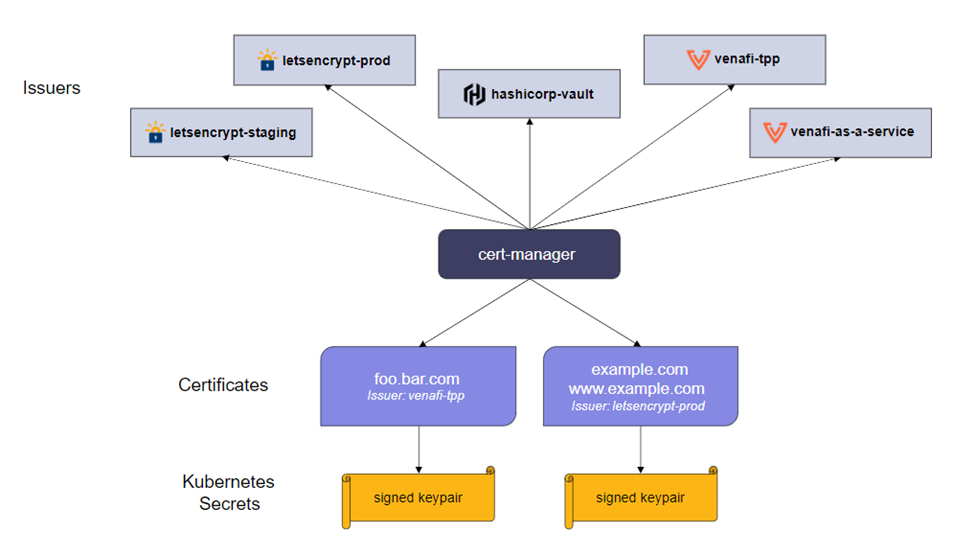
Reference: https://cert-manager.io/docs/
The first step is to create a ‘CustomResourceDefinition’ resource to manage them conveniently later.
kubectl apply -f https://github.com/cert-manager/cert-manager/releases/download/v1.14.5/cert-manager.crds.yaml

Then it is required to add the Jetstack Helm repository.
helm repo add jetstack https://charts.jetstack.io

Then we need to update the jetstack repository even though it is optional.

We are going to deploy the cert-manager in a separate Kubernetes namespace and therefore we need to create it first.
kubectl create namespace cert-manager
Then we can deploy the cert-manager using the helm chart. Prior to that we can prepare a YAML file to include our preferasions. A sample values file is in figure 4.5.5.

Please check the documentation here before running the command. The version (1.14.5) was available at the time of writing this article.
helm install cert-manager -n cert-manager –version v1.14.5 jetstack/cert-manager -f cert-manager-values.yaml
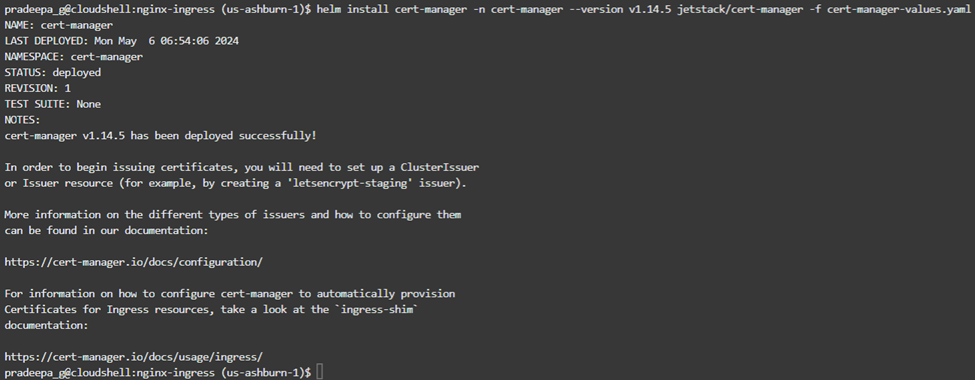
As you can see in the out of cert-manager installation, it requests to configure the certificate issuer as the next step.
For this, we need to create YAML for the “Let’s encrypt” issuer with our details. We are going to deploy this on our ‘backend’ Kubernetes namespace.

We can now install the issuer as below.
kubectl apply -f issuer.yaml

We can see the issuer ‘letsencrypt-nginx’’ is now in ready state.

Now the implementation is completed but we need to do one more change. If you can remember, we created an ingress rule for the application but it did not contain any certificate details. Since the security certificate is ready we can include it in YAML file and redeploy.
The updated ingress YAML file is as follows. Here, include the cert-manager and secret names to the file.

Deploy the YAML again after updating the file. This is covering the ‘quote’ application deployed earlier.
kubectl apply -f quote_ingress.yaml

It might take a while for the TLS certificate to be prepared. We can check this by checking the orders, certificaterequest and certificates.

If the order is in ‘valid’ state, certificate request and certificate are in ‘true’ state, then our TLS certificate is ready and working !
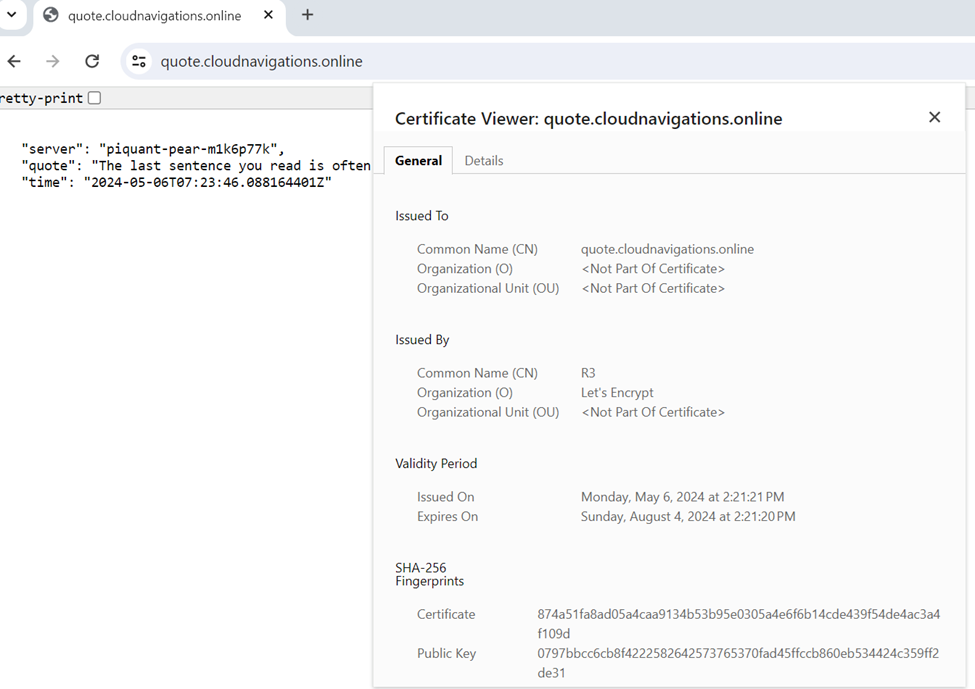
Let’s test this out. Go to a web browser and type the URL of the quote application again.
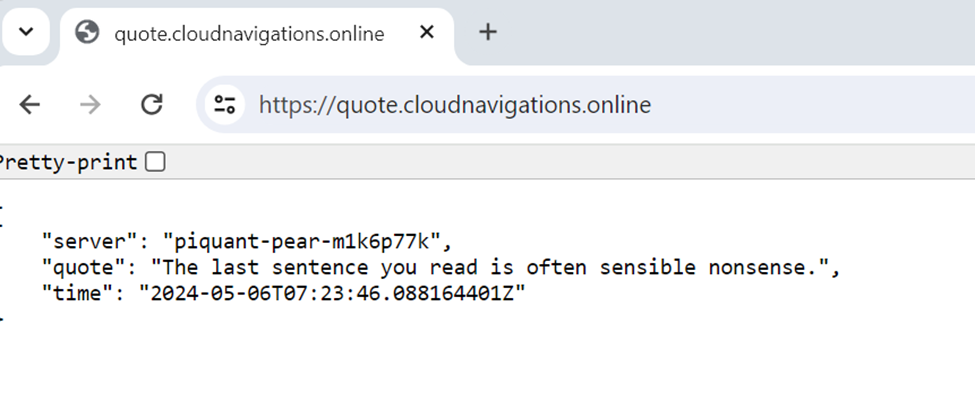
It works ! the certificate warning no longer exists. Further, if you access as ‘https’ its showing as secured link.
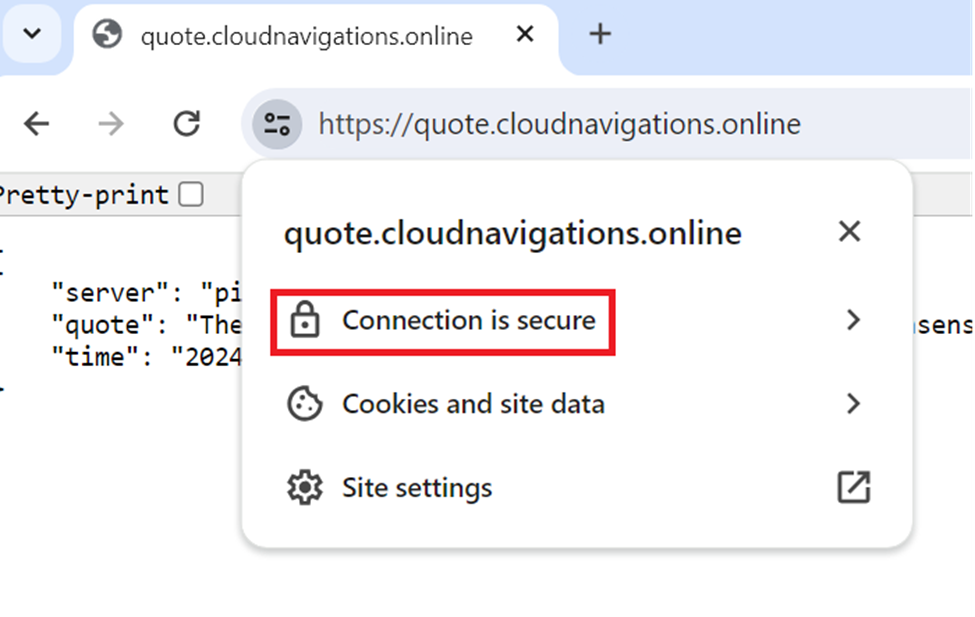
We can access the certificate and see the details like the issued organization (in our case Let’s encrypt) and expiry dates.
4.6 Create Second Backend Service
Even though now our intention is fully completed, this section will deploy our second application as well. In this approach you will get an idea how to do the deployments after the security configuration.
Similar to previous service implementation, we need to prepare YAML files for the deployment, service and ingress.


Using the kubectl commands, we can install the deployment, service and ingress rules as below.

After installing the ingress rules, it might take a few minutes to generate the certificate for the new application ‘echo’. We can monitor the availability as below.


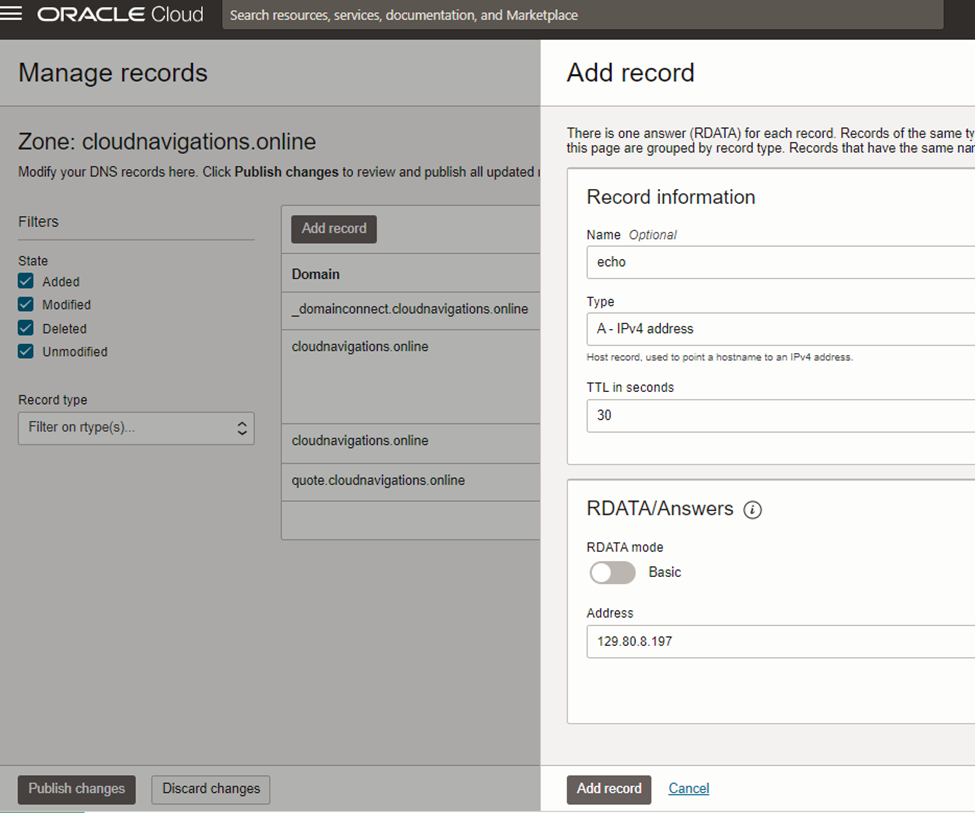
Now the Kubenetes level access is completed as the ingress controller learned the route. We need to add another A record to our DNS for this application as well.
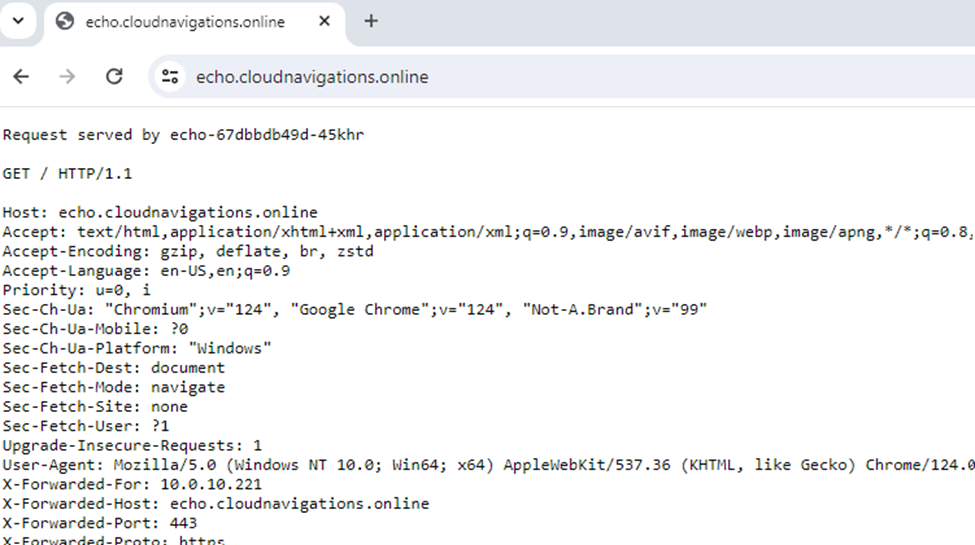
We can access the ‘echo’ application by clicking the URL on a web browser.
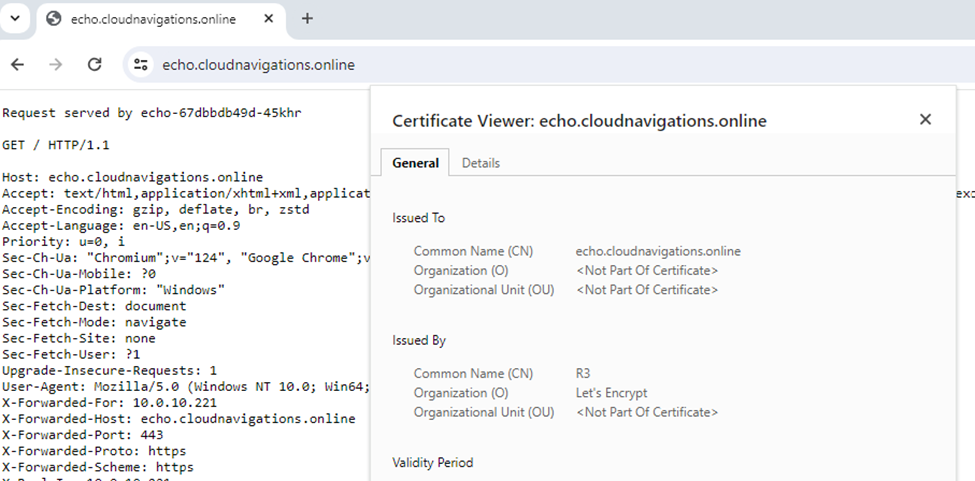
The certificate of the new application is now available as expected.
This concludes the implementation of TLS on Oracle cloud infrastructure OKE with the help of nginx ingress controller. We covered all the steps to achieve this.
- Install Nginx Ingress Controller
- Configure DNS
- Create First Backend Service
- Configure Nginx Ingress Rules
- Configure TLS Certificate
- Create Second Backend Service
Please leave your comments below.
References
https://github.com/digitalocean/Kubernetes-starter-kit-developers
https://github.com/kubernetes/ingress-nginx/blob/main/charts/ingress-nginx/values.yaml
https://blogs.oracle.com/cloud-infrastructure/post/how-to-manage-your-godaddy-domain-with-oci-dns
https://artifacthub.io/packages/helm/cert-manager/cert-manager
https://cert-manager.io/docs/configuration/
https://cert-manager.io/docs/
