
In this blog, we are testing how applications spread their deployments over node pools in Oracle Kubernetes Cluster (OKE). This capability is expected to manage workloads in production.
Firstly, what is node pool? Node pool is subset of worker nodes in OKE cluster. All worker nodes in a single node pool has same configuration. Because of this, if anyone wants to bring worker nodes with different configuration, they can do so by adding a new node pool.
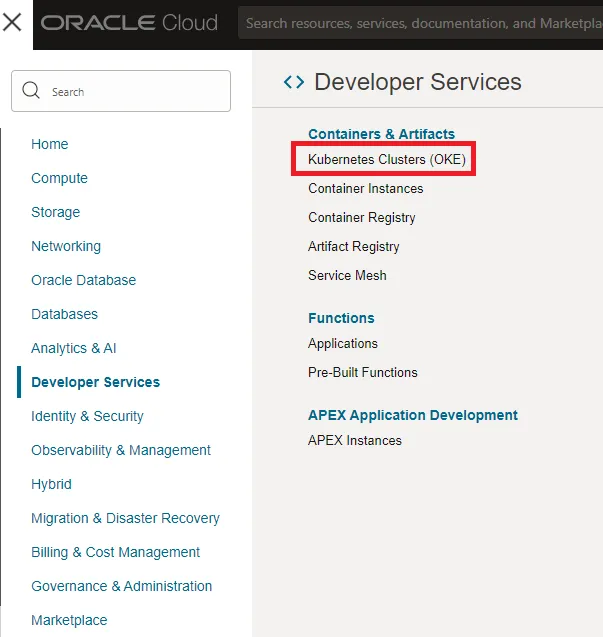
As you may know OKE can be access via console under Developer Services as shown in figure 1.
This blog does not cover basics like creation a cluster. If you want more information on those please refer to my previous blog here.
Scenario
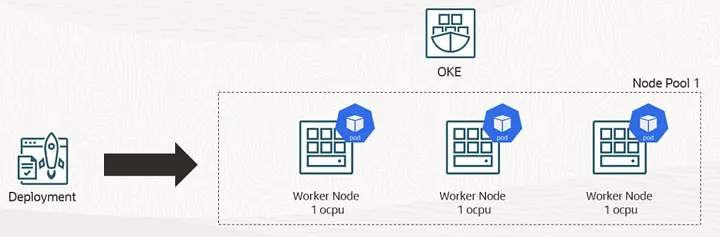
This is what we are trying to do. Firstly, we’ll get OKE cluster with one node pool and deploy an application.
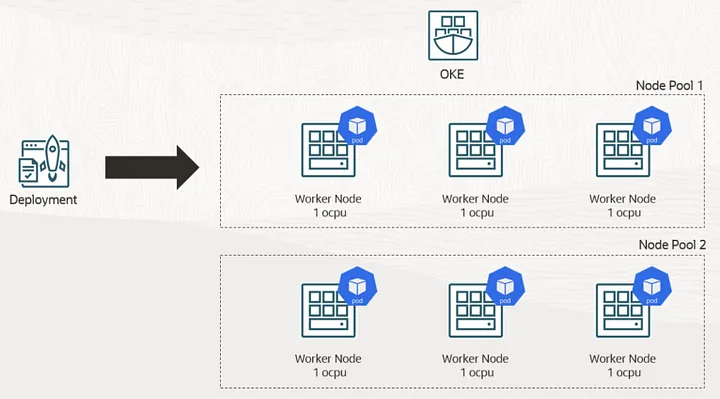
Then we’ll add another node pool with different configuration. After that we can observer how ‘pods’ or application deployment transfer to newly added node pool once the application scale up.
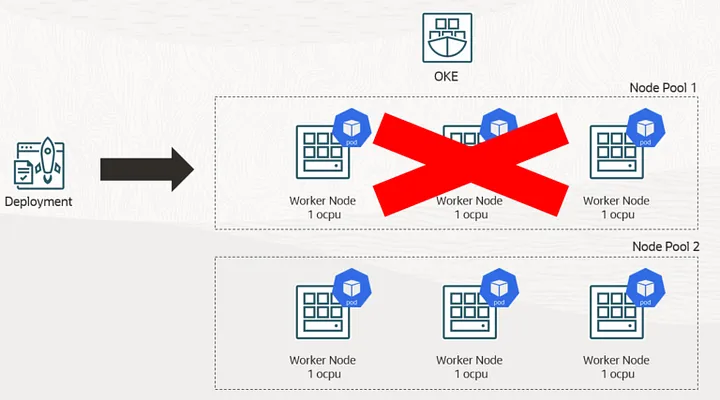
Finally, we’ll delete the original node pool and see the application now completely run on new node pool.
Testing
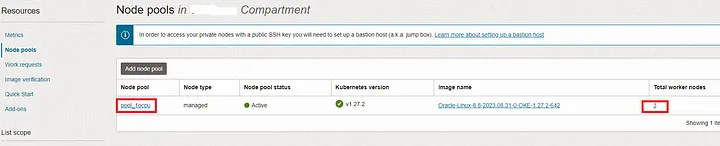
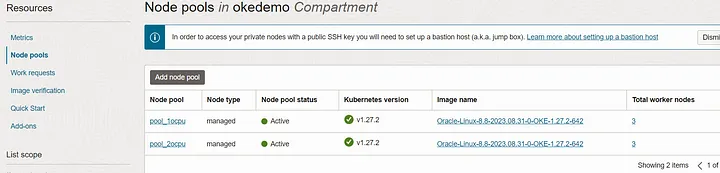
As in figure 5, you can verify the node pools of OKE cluster from console under the the resources section. For easy identification I renamed the node pool as ‘pool_1ocpu’. This pool is created with worker nodes of 1 ocpu.
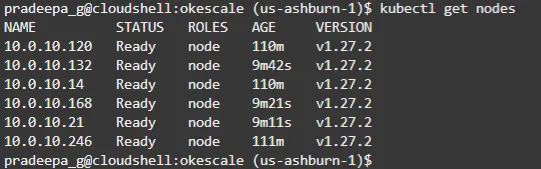
By login into cloud shell you can execute ‘kubectl’ commands and verify the nodes available for the cluster (figure 6).

Now, lets deploy simple application on this cluster. I took the below “nginx” deployment code from here.
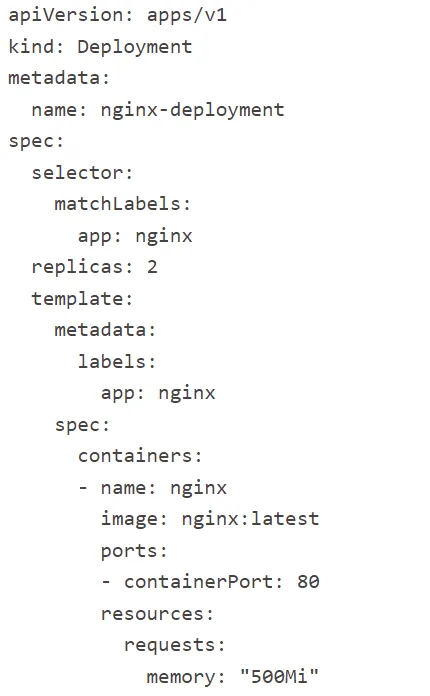
Save the code as yaml file and deploy as below.

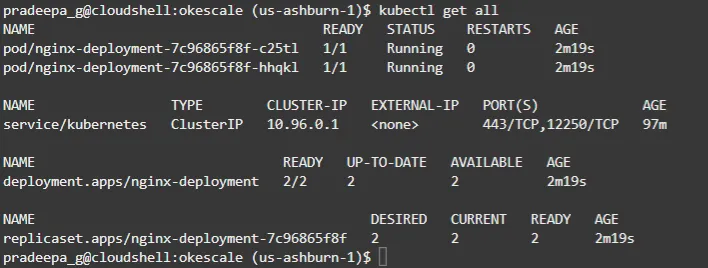
With the command, ‘kubectl get all’ you can monitor the application deployment along with pods. In our case we have only two pods available.
As in figure 10, we can check the IPs of worker nodes which are hosting application pods.

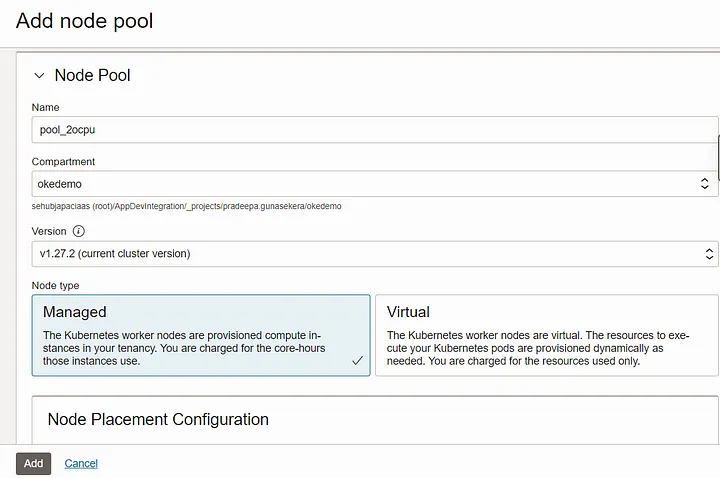
Now, we’ll add another node pool to the cluster.

Here, I’m creating new pool with 2 ocpu config and name it as ‘pool_2ocpu’.
Once created, both pools can be observed from the console.
With kubectl command you can verify all worker nodes from both node pools are available as in figure 14.
The application deployed with two replicas by default. Which means only two pods are created as of now. In order to observe the spread of application over the nodes and node pools, lets scale the application to 100 pods as in figure 15.

You can verify the operation with ‘kubectl get deployment’ command. It will show you the progress and actual availability of the pods.

Once the scaling operation is completed, we can check what nodes newly used for the deployment. As you can see in figure 17, it now deployed to nodes from both node pools.

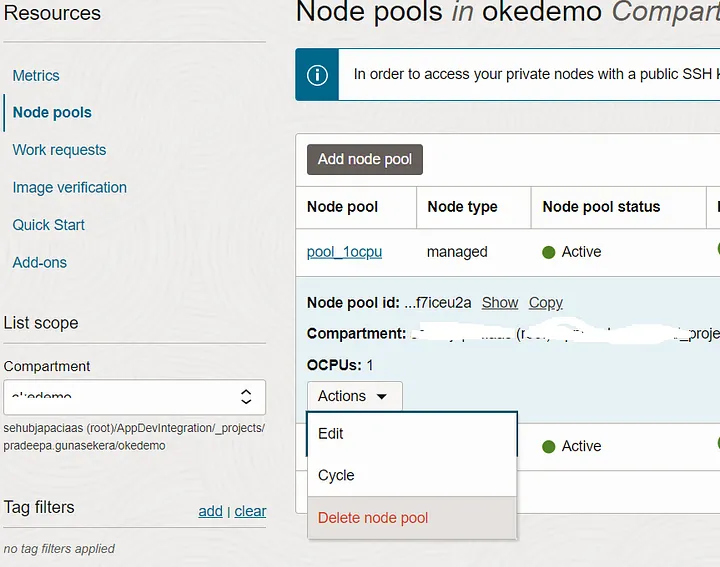
Which means the application now spread to worker nodes from both node pools without any app or config modification. Lets make this little interesting by deleting original node pool. This will terminate all worker nodes of that pool.
Now, you can verify the application running on workers nodes of secondly added pool only.

Summary
In this blog we observed that an application can be easily scale to new node pools on OKE cluster. Even after deleting original node pool it can run on the newly added node pool.
References
Using the Kubernetes Cluster Autoscaler
Pulling Images from Container Registry
Oracle Container Engine for Kubernetes (OKE) – Lets get started